


Your fence is the first thing people see and the last thing you want to worry about.
Picture a clean entry with a wide, welcoming gate. The lines along your pasture are straight where they should be and gently curved where the land asks for it. Colors frame the views you love. Rail counts change by zone so everything feels orderly and purposeful. That is the promise of a ranch fence design with HDPE (high-density polyethylene) post and rail from Derby Fence. It looks good, works hard, and frees up your time.
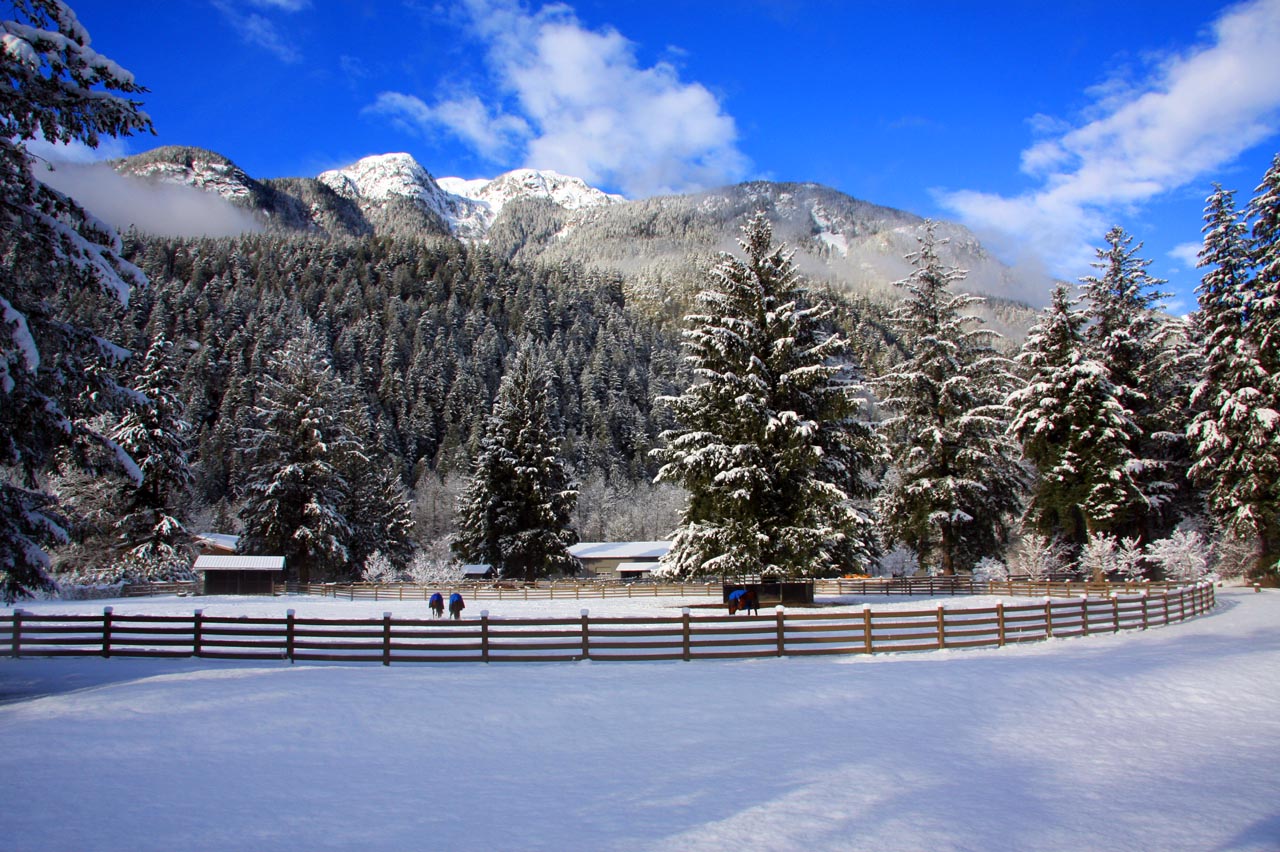
HDPE gives you a durable, low-maintenance system that holds its color and resists cracking and peeling. Just as important, it gives you flexibility. You can choose from two to five rails, match colors to the land and buildings, and plan straight runs or graceful curves.
With HDPE ranch fencing, you can refresh your property without adding chores and achieve the perfect balance of style and practicality.
10 Stylish & Practical Ranch Fence Design Ideas
Design is the fastest way to change how your ranch feels day to day. With HDPE post and rail, you get a kit of parts that lets you compose the property the way you want people and animals to move through it. Think of rail counts as a way to set boundaries and height, color as a way to guide the eye and connect with the land, and curves and gates as the places you create moments.
The following ideas show how simple, repeatable choices add up to a property that reads clean from the road and works smarter inside the fence line.
1. Use Rail Counts to Signal Purpose by Zone
Choosing the right rail count is a fast way to communicate intent across a property. Rail count affects how a line looks and how it behaves, shaping sightlines, containment, and the way people and animals move. Higher counts project presence and control, while lower counts keep views open and costs efficient. Use rail count as a visual language so every zone explains itself before anyone asks a question.
Frontage & Entries
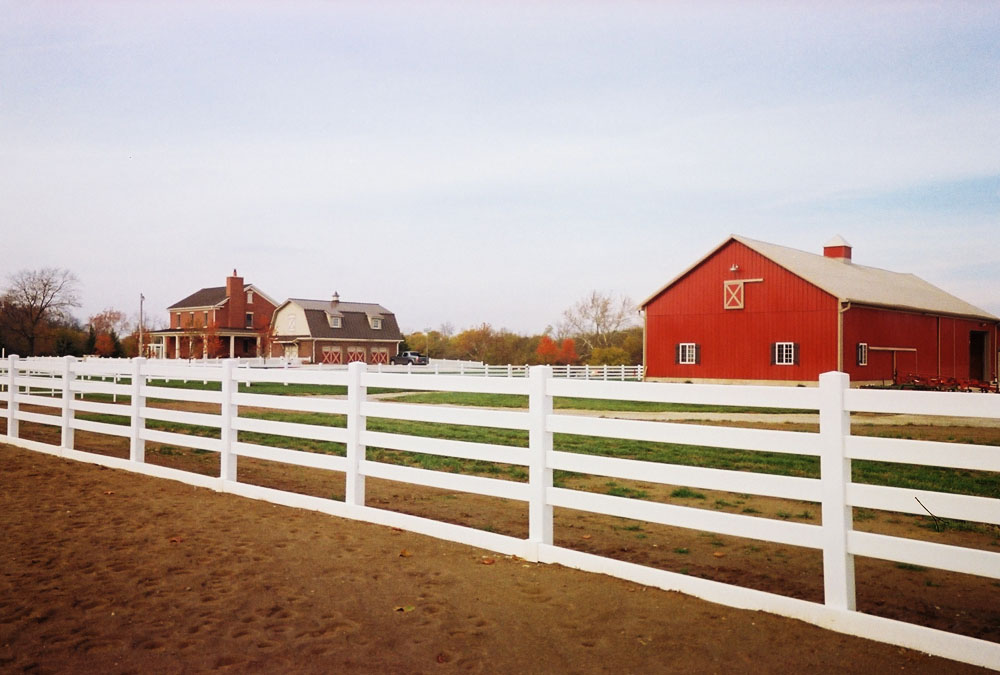
Three or four rails create a classic, substantial profile that reads well from the road. From a distance, the added rail increases visual weight so the line frames the drive and gives the entry a taller, more finished edge. This approach also photographs well for listings or social updates because the fence holds a straight, bright horizon that sets off barns and landscaping.
Livestock Safety Zones
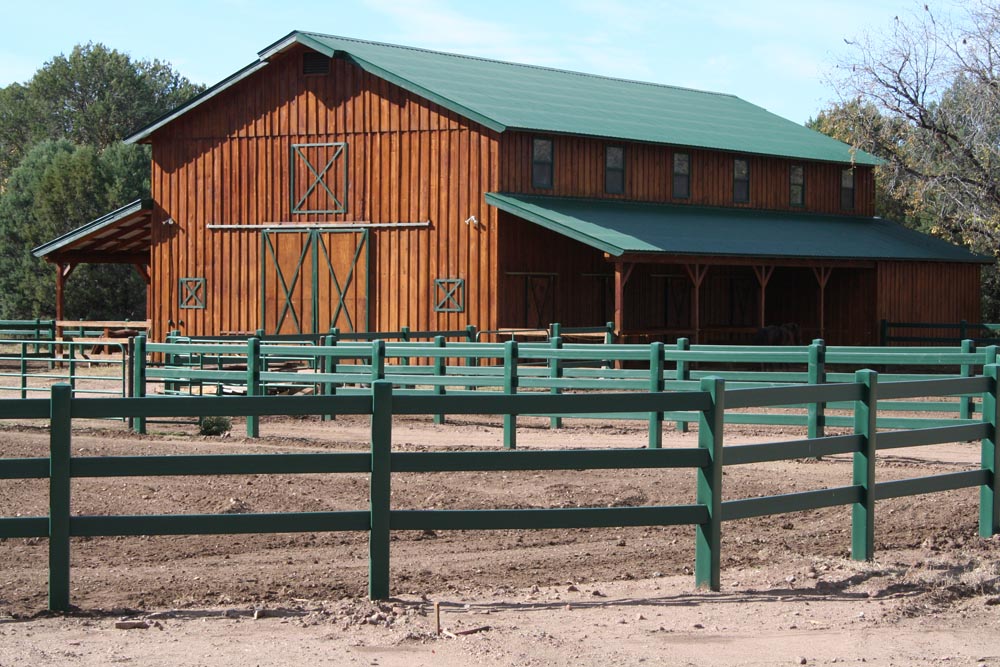
Four or five rails add a stronger visual and physical boundary where you need it most, such as foaling areas, training pens, or near busy work yards. Closer vertical spacing between rails reduces the chance of young animals testing an opening and keeps attention inside the space during training. In higher energy zones, the extra rails also give handlers more confidence because the barrier reads as solid at a glance.
Pasture Boundaries
Two or three rails provide long runs with a clean look while keeping views open and material use efficient. The lower profile blends into pasture edges so you can see across multiple fields without the fence dominating the view. For large perimeter lines, this choice reduces total materials while still establishing a clear, orderly edge that is easy to patrol from a truck or UTV.
Transitions
Switch between rail counts at a corner or at a gate post. The eye reads the change as intentional, and the line stays tidy. It’s also a practical detail during installation because posts at corners and gates are already braced and aligned, which makes the height shift simpler to execute and easier to maintain over time.
2. Color Strategies for Curb Appeal & Wayfinding
Color does more than provide aesthetic appeal to a fence. It also manages attention, signals where people should go, and clarifies the difference between public facing edges and working interiors. Light tones lift frontage and improve visibility, while earth tones recede so operations take the focus. In this way, color is quiet signage that simplifies navigation for visitors and staff.
Classic White for Frontage
White is bright, timeless, and easy to rinse clean. On public facing edges, it creates a crisp frame that lifts the appearance of the entire property. Because it catches light, white also improves visibility at dawn and dusk along the road and at the main drive.
Earth Tones for Working Areas
Tan and darker hues recede into tree lines and ridges. They blend with the landscape so your eye stays on animals and operations. In dusty or wet seasons, these tones hide splash and dirt longer, which keeps working zones looking tidy between rinses.
Two-Color Site Plan
Use one color for public-facing frontage and a complementary color for interior pastures. This simple rule becomes natural wayfinding. Visitors follow the bright color to the entrance and main lane while staff recognize interior divisions by the quieter tone.
Accents at Posts & Gates
A contrasting color on corner or gate posts gives structure and hierarchy without adding clutter. This approach is especially helpful where multiple gates are in view because the accent calls attention to primary openings and makes secondary gates read as secondary.
3. Statement Entryways That Welcome & Organize Traffic
An entry does two jobs at once: It sets the tone for the property and manages traffic under real conditions. Good entries give large equipment space to move, guide visitors without confusion, and present a clean identity from the road. Build for grace and efficiency so arrival feels easy in all seasons.
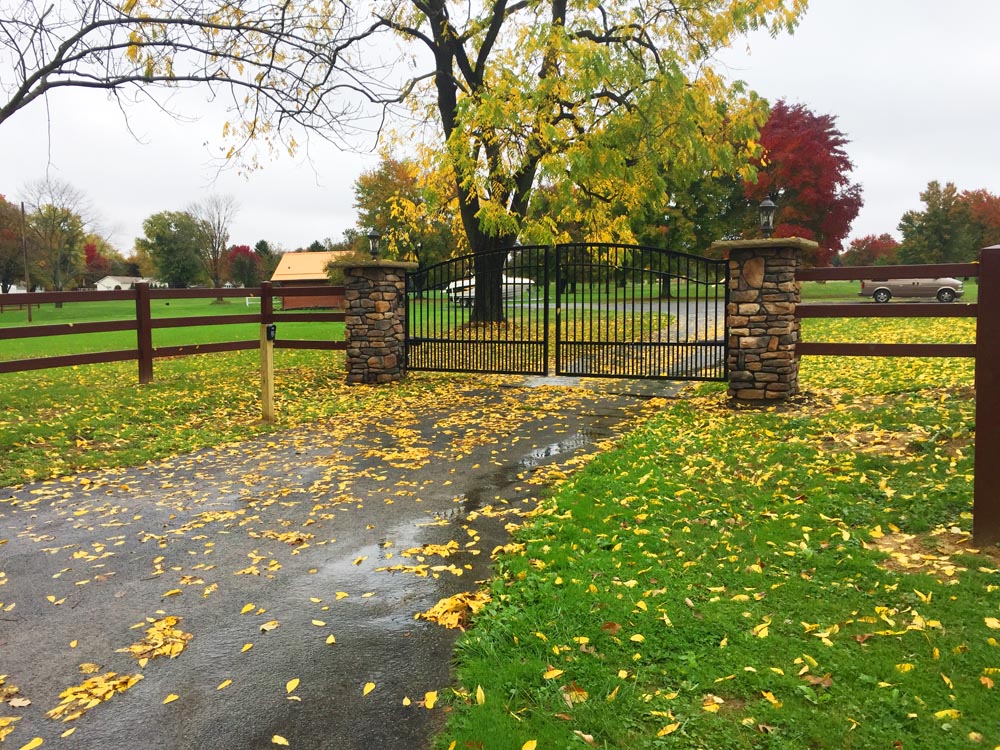
Double Swing or Slide Gate Sized for Your Biggest Trailer
Twelve to 16 feet is common for a single opening. If you regularly move wide equipment, plan a wider span or a double opening. The right size prevents rutting from repeated tight turns and reduces stress when loading or unloading under time pressure.
Wing Fencing
Add three or four short panels on each side of the gate that flare outward. It creates a small court that guides vehicles in and out and makes the entry feel substantial. The wings also protect the gate from bumps because the first impact point is a line of rails, not the hinge post.
Branding Panel
Reserve a spot between posts for a farm name sign. The fence frames it so the entry feels finished without extra structures. A simple panel makes delivery drivers and visitors confident that they are in the right place.
Lighting
Solar post caps add a helpful marker at night without wiring. Even a few fixtures at the drive create depth cues and make the opening visible during storms or early starts.
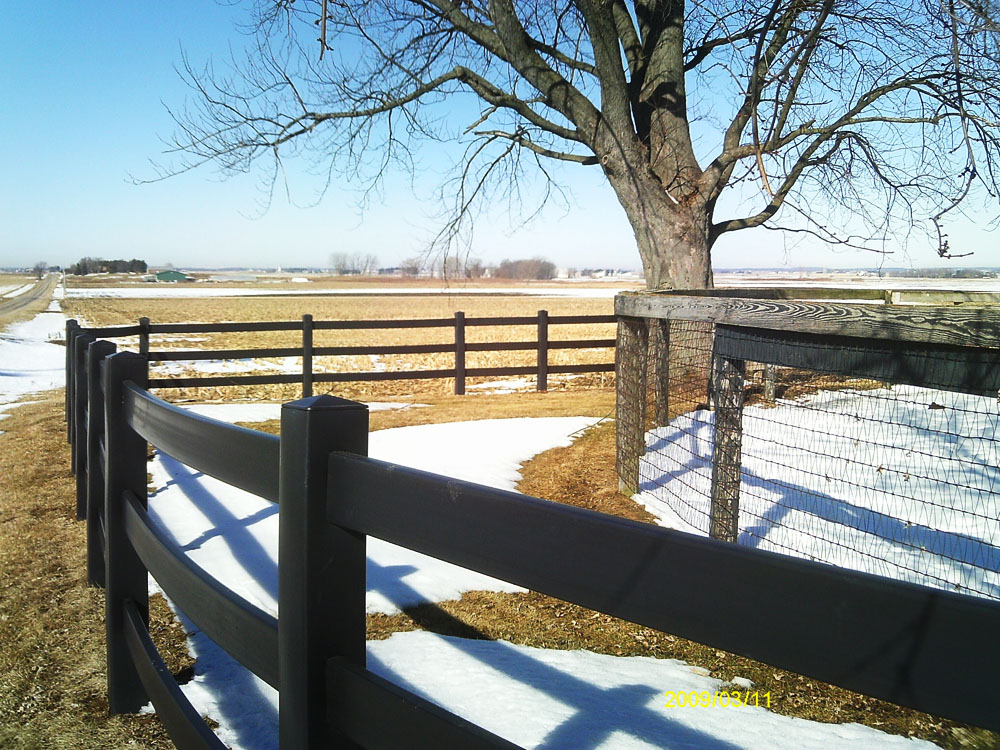
4. Curves, S Curves, & Gentle Radiuses
Curves soften long runs and help a fence sit naturally in the land. Gentle arcs reduce visual tension, create better approach angles for trailers, and frame views without extra structures. With flexible materials, you can follow grade and tree lines while keeping spacing even. Used sparingly, curves add a custom feel and make everyday movement calmer.
Entry Drives
A gentle arc leading to the main gate frames the approach and gives trailers more room to swing. The curve slows the visual tempo so the entrance feels calm rather than abrupt. When the posts track the arc evenly, the fence reads premium as you arrive and leave.
Contour Following
Allow the fence to track a hill or tree line with a soft bend. Straight lines can fight rolling ground and draw attention to small grade changes. A light curve lets the fence sit into the land so it looks intentional from every angle.
View Framing
Use an S curve to reveal a view of a barn, a pond, or a landmark tree. The first curve hides and the second reveals, which turns a basic pasture edge into a small landscape moment. This technique works particularly well along drives and walking paths.
5. Paddock Design That Looks Good & Works Hard
Well-planned geometry pays for itself in safety and maintenance. Clean shapes stack neatly along a lane, make rotation predictable, and keep movement stress low for animals and people. Standardization also speeds repairs because parts and spans are interchangeable.
Design paddocks to be both tidy and tough so they hold up under daily use.

Equal Size Paddocks
A row of equal paddocks along a lane looks tidy and makes rotation predictable. Standard sizing simplifies feed and pasture planning because the forage and wear rates are easier to compare. It also allows spare rails or gates to fit any pen in the row.
Lanes & Alleys
Straight alleys with clear sightlines help animals move calmly and give equipment the room it needs. When handlers can see from one end to the other, movement is smoother and there are fewer surprises around corners. Additionally, good alleys keep trucks out of fields during wet periods.
Round or Octagonal Pens
Smooth corners reduce hang ups during training and make it easier to keep animals focused. Octagons give a round feel while using straight segments, which speeds layout and installation. Choose a higher rail count for containment and a lower rail count on spectator sides for visibility.
Viewing Sides
Use two or three rails where people watch so the action is easy to see. On the working side, step up to a higher rail count to create a stronger barrier. This balance keeps the space friendly for guests while staying practical for training and handling.
6. Rotational Grazing Layouts with Clean Sightlines
A good rotation pattern reduces labor and improves animal behavior. When gates align and paths are obvious, moves happen quickly with fewer hands and less stress. Clear perimeter identity keeps testing down while interior divisions stay light for visibility. Plan the pattern once and let it guide daily decisions without extra talk.
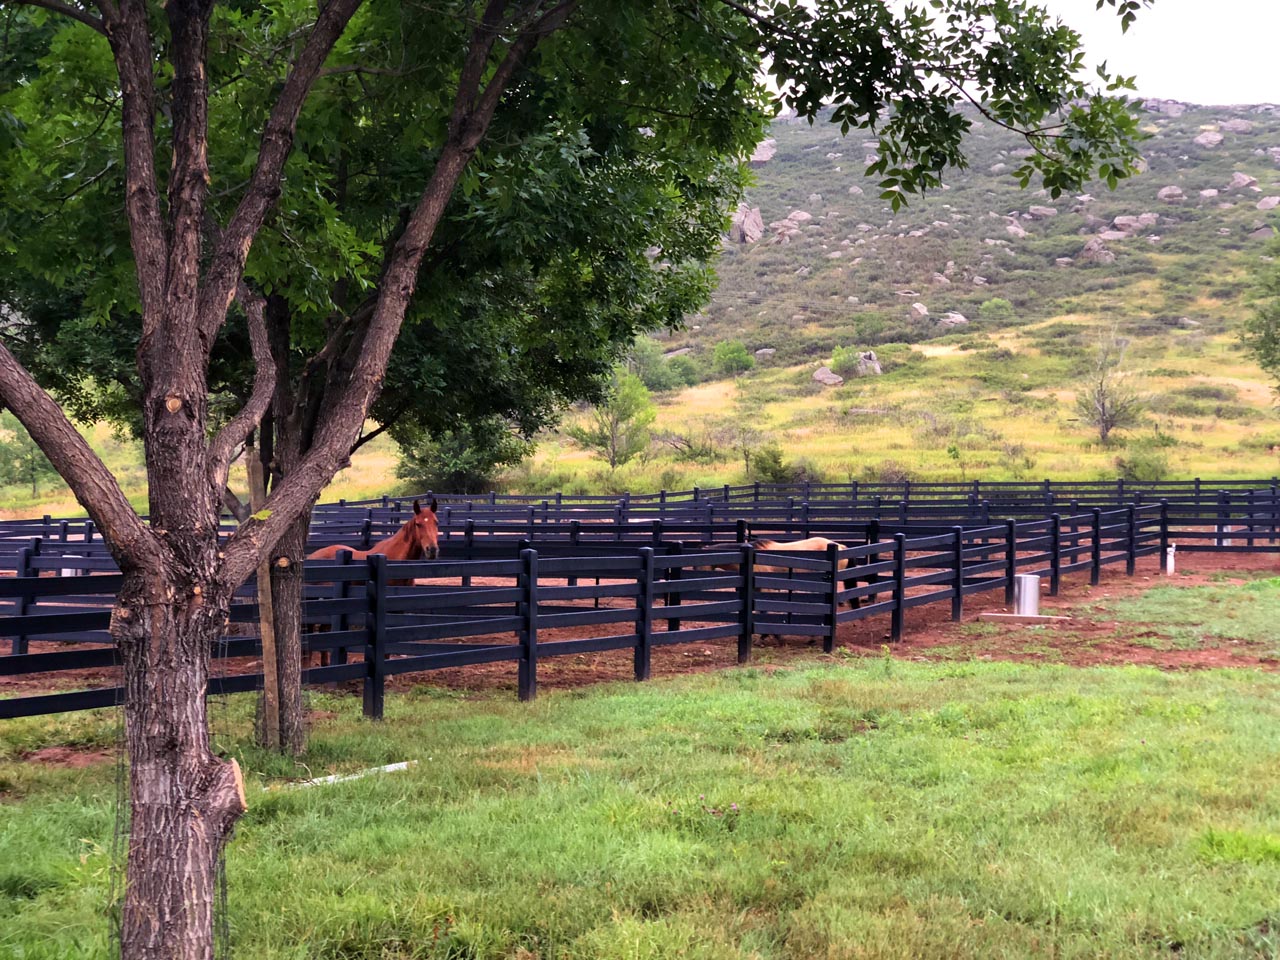
Hub & Spoke
Place water at the center and divide paddocks like slices. Animals learn the pattern quickly because the next move is always a straight shot from one slice to the next. Keep the perimeter a higher rail count and the interior divisions a lower rail count for instant visual clarity.
Straight Line Movement
Align gates so animals move from one paddock to the next without backtracking or crossing traffic. Straight lines reduce handling time and make moves possible with fewer hands. The clear path also keeps machinery routes simple when you need to mow or reseed.
Clear Perimeter Identity
A four- or five-rail perimeter around the rotation tells people and animals where the outer edge is at a glance. This visual certainty reduces testing at boundaries and helps visitors respect the working area.
7. Waterways, Crests, & Scenic Boundaries
Some edges protect sensitive ground while others are pure show. Treat them as special cases. Pull the fence back from water, keep the horizon line clean at crests, and use gentle curves to create small moments along drives. A few restrained moves can turn everyday edges into the best views on the property.
Waterway Edges
Darker tones recede so the pond or stream remains the focal point. Set the fence far enough back to protect banks and allow a vegetated buffer. From across the water, the quieter color disappears, and the landscape reads as a whole.
Hill Crests
Step from three rails to four near a crest to maintain a balanced profile against the sky. Without the step, the top line can feel short from the low side. The extra rail brings the silhouette back into balance and keeps the horizon clean from the house and drive.
Scenic Pull Offs
Use a short curved section to create a small overlook along a drive. A bench or hitching post nearby turns it into a destination of its own. And because HDPE cleans easily, this small feature stays inviting even with regular use.
8. Safety Forward Corners, Ends, & Crossings
Small details control risk and save time. Corners, ends, and crossings are where pressure builds, where equipment turns, and where animals hesitate. Plan for flow with rounded moves, clear sightlines, and consistent finishes so the fence guides behavior without hard stops. A few upgrades here prevent the headaches everyone remembers.
Rounded Corners or Forty Five Degree Turns Where Animals Move Often
Sharp corners encourage bunching and can lead to rubbing or damage. A modest radius keeps the line moving and is easy to maintain with a string trimmer. Rounded corners and gentle angles help the flow stay smooth and pressure points disappear.
Double Gate Crossings in Busy Areas
A wider crossing improves sightlines and gives equipment room to pass. When two gates meet, handlers can stage animals on one side while a tractor uses the other, which reduces conflicts during chores.
Uniform End Caps & Post Caps
Matching caps finish the line and strengthen the premium look. Caps also keep water and debris out of posts, which helps alignment stay true season after season.
9. Visual Rhythm with Post Spacing & Segmenting
Long runs should feel calm and intentional. Rhythm comes from consistent spacing and a few planned landmarks so the eye can rest and reorient. Get the baseline beat right first, then add gentle features that help with wayfinding and future tie-ins. The result is a line that disappears when it should and stands out when it helps.
Consistent Post Rhythm
Even spacing is the foundation of a clean look. When posts march at a steady beat, the rail reveals are uniform, and the fence reads as one continuous element rather than many parts. This calm pattern is what makes aerial photos and road views look professional.
Feature Segments
Every few hundred feet, introduce a gentle curve, an aligned gate, or a color accent to create a visual landmark without breaking the pattern. These moments help with orientation on large properties and give you logical places to tie in future expansions.
10. Mix Functional Heights Without Visual Clutter
Different fences have different jobs. Some need presence for security and visibility, while others should fade into the background to keep views open and materials efficient. Fortunately, you can vary fence presence across the property without making it look busy. Change height where structure is already strong and the eye expects it so the overall line stays clean.
Roadside Presence
Four rails along the road create stature and a strong edge. The higher profile deters casual entry and sets a neat line that frames your frontage landscaping. For example, from the cab of a truck, the fence reads level and intentional.
Rear Pastures
Two or three rails keep views open and material use efficient. The lighter profile allows fields to feel bigger and lets you monitor herd movement at a glance, which is especially helpful on properties with varied terrain where a heavy line would create visual noise.
Clean Handoffs
Make changes at a corner or gate post so the shift feels planned. When the step happens at a strong structural point, the height change doesn’t draw attention, and the line remains elegant.
How to Bring Your Ranch Fencing Vision to Life
A good plan is what turns nice ideas into a fence that installs smoothly and looks right from day one. Start by reading your land. Decide what each zone must do, then sequence choices so crews can work efficiently and future phases snap into place.
Follow these steps for a straightforward path from sketch to clean finish.
Map Your Property & Define Zones
Begin with a simple sketch or an aerial map. Mark frontage, paddocks, alleys, training pens, driveways, water features, and any sensitive areas. Note slopes, wet spots, and trees you want to keep in view or protect. A few minutes of walking with a notepad reveals routes you use every day that should shape the plan.
Label the primary goal of each zone: Aesthetics for frontage, containment and safety for foaling areas, visibility and movement for lanes, etc. Make a short list of must-haves for each zone, such as a 12-foot gate on the north paddock or a curved approach at the entry. These notes become your design rules and your installation checklist.
Choose Rail Counts & Colors by Zone
Assign two to five rails to each zone based on safety, visibility, and style. Put higher rail counts where animals test boundaries or where you want more presence from the road. Use lower rail counts where long views matter and where you want a lighter touch.
Next, select a color scheme that ties the property together. A single color across the entire site is calm and classic, while a two-color plan adds wayfinding and depth. Place color samples near barns and house siding, and check them at different times of day. If you are on the fence between two tones, use the brighter on public edges and the quieter inside the fence line.
Note where the rail count or color changes. Plan to transition at gate or corner posts so the shift looks natural. On your map, circle these locations and jot the exact rule, such as stepping from three-rail tan to four-rail white at the south gate. Clarity here prevents field changes later.
Plan Your Lines
Decide where straights are best for efficiency and where curves will enhance entries or frame views. Use string lines or marking paint to test a proposed route before you set a single post. Stand back to the road and to the house and check how the line reads against the horizon.
Keep post spacing consistent across straights and curves. On curves, lightly tighten spacing so rail reveals remain even. Avoid tight bends that create short inside posts or force awkward rail angles. If a tree line pushes your route, add a small S curve rather than a sharp jag. The result will look intentional and be easier to maintain with a mower.
Gate & Traffic Planning
Size primary gates for trailers and equipment. Measure your widest setup and add comfortable clearance. Place gates where animals and vehicles already want to travel. Align openings with alleys and handling areas so moves are straight and calm.
Add pedestrian gates where you walk often to shorten loops. On long lanes, mirror gate locations from one paddock to the next so handlers always know where the opening is. If snow or mud is common, choose gate locations with good drainage and solid base so approaches stay usable year round.
Prioritize Corners, Terminations, & Elevation Changes
Corners and ends do more work than straight sections. Set strong corner posts and use bracing suited to the turn angle and run length. Confirm local frost depth for posts and keep top heights consistent so the rail line reads level to the eye even when the ground changes.
Where ground rises or falls, step rail counts or adjust post heights slightly to keep the top line even from common viewing angles. On long slopes, break the run into segments at natural land features so the line can reset without drawing attention.
Take a reference photo from the house or main drive to confirm the look before you set the whole section.
Budgeting & Phasing Without Compromising Design
If you plan to build in phases, follow two simple rules: 1) Keep color and post style consistent across phases so everything matches later, and 2) complete entire zones in each phase so the property feels finished at every step.
Order materials by zone to reduce waste and simplify staging. Place pallets near each zone so crews are not hauling rails across the site. If a later phase will add gates or a higher rail count in a particular area, build the corners and terminations now so the future work drops in cleanly without rework.
Installation & Upkeep Basics for HDPE
Preparation saves time. Call to mark utilities. Pull string lines along straights and define radiuses for curves with marking paint. Set posts to consistent height and alignment using a simple story pole you can reference along the run. Check the first 10 posts from multiple angles before you commit to the next 50.
As you install rails, step back every few panels to confirm reveals are even and that the top line reads straight or gently curved as intended. After installation, a periodic rinse and quick inspection keeps the fence looking new.
Replace damaged rails or caps as needed. Keep a small stash of spare caps and one or two spare rails per zone on hand so a quick fix is always at your fingertips.
FAQs About Styling & Designing Ranch Fences
Can I Mix Rail Counts & Colors on the Same Property Without It Looking Busy?
Yes. Use clear rules by zone and keep transitions at corners or gates. Repeat combinations rather than improvising from one run to the next. The eye reads repetition as order.
How Tight Can My Curves Be & Still Look Smooth?
Gentle radiuses look best and are easier to install with consistent spacing. When in doubt, open the curve. It will read as intentional and upscale.
What Rail Count Is Best for Foals & Cattle?
Use higher rail counts where you need a stronger visual and physical boundary such as foaling areas, training pens, or crowding zones. For large perimeter runs, two or three rails balance visibility and efficiency. Match choices to your animals, terrain, and handling practices.
How Do I Transition Cleanly Between Three-Rail & Four-Rail Sections?
Make the change at a gate or a corner post. Keep post heights consistent, and let the rail count do the visual work. This approach reads as a planned handoff rather than a mid-run change.
What About Snow, Wind, & Slope?
Set posts to local frost depth, use sound corner bracing, and align rails along the grade. For windy sites, keep lines broken into sensible segments with solid corners. On slopes, small height adjustments at posts maintain an even top line from the most common viewing angles.
How Wide Should My Main Gate Be?
Size for your largest trailer or service vehicle. Twelve to 16 feet is common for a single opening. Double swing openings create wider passages where needed.
Will Color Fade or Show Dirt?
Light colors show dust sooner but rinse quickly, while darker tones recede along tree lines and ridges and can hide dirt longer. Additionally, HDPE finishes are UV resistant and designed to prevent fading.
Can I Add Lighting or Signage?
Yes. Accent posts at the entry can support solar caps or a branding panel. Use compatible mounting methods and follow guidance for HDPE components.
How Do I Keep Long Fence Lines from Feeling Monotonous?
Maintain consistent post rhythm and introduce a gentle curve, a well-placed gate, or a subtle color accent every few hundred feet. This strategy creates landmarks without breaking the pattern.
Can I Retrofit Rail Counts or Add a New Gate Later?
Yes. Plan the end conditions today so future changes have a place to land. When corners and terminations are built well, adding a gate or stepping to a higher rail count is straightforward.
Find the Best Ranch Fencing at Derby Fence
A good ranch fence marks boundaries, guides traffic, supports safer handling, and shapes the way your land is experienced. With HDPE fencing from Derby Fence, you can design with rail count, color, and layout to create a property that works better and looks better day after day. Start with your zones, standardize gates and post spacing, and use curves and accents where they add calm and clarity. Small choices add up to a fence that earns compliments and saves time for years to come.
Ready to map your ranch and choose the right combinations of color and rail counts for each zone? Contact Derby Fence today for a free quote and personalized fencing consultation. Our team is here to help you create a safe, beautiful, and efficient property with the highest-quality HDPE ranch fencing on the market.